Monday, 28 December 2015

Sneak Peek into 2016!

As the festive season comes to a close, I was able to find some time to finally play with my pre-order products from the 2016 SAB and Occasional Catalogue.

I know you are all going to love whats in store in 2016, so I thought I would share a little peek at just some of the new products that you will have an opportunity to play with soon.

The first card was using the SAB - Sky is the Limit. A fantastic stamps that can be yours for free when you spend $90 or more during the Sale-A-Bration period. You will also see a glistening of Wink of Stella just to make the card sparkle. There is also a insight into the Perfectly Artistic DSP, also a SAB special.


The next three cards were a variety from the Botanical Suite (there are items in both the SAB and the Occasions catalogue that sit within the Botanicals suite) 


The Botanical Gardens DSP, The Botanical Builder Framelits, The Botanicals For You SAB Stamp set were all used to make these creations. Can you spot - The sentiment from the SAB Perfect Pairings set, The Gold Embossed Flowers, The woven technique. Creating a variety of cards using one suite that matches makes life so much easier.

The last card I made I used the It's My Party Suite. It's my Party DSP, Confetti Textured Impressions Embossing Folder and the Party Wishes stamp set were used to make this subtle yet effective card. Mint Macaron is the dominant colour used here, but you will notice I used the Wink of Stella Glitter brush again and some Silver Thread just to add a little shine and sparkle.


These products will be available from 5th January 2016. Make sure you subscribe to my newsletter to stay up to date. You can also come along to my catalogue launch on Sunday 17th January if you live in Brisbane - RSVP through my website today. I look forward to sharing these new products with you all. Don't forget you can also hold your very own workshop (in person or online) to also gain the hostess benefits during Sale-A-Bration (all hostesses get an extra $40 on top of rewards for any sales over $400 as well as one SAB product for every $90 spent) Contact me to arrange one today - nikkimierssu@gmail.com

Sunday, 20 December 2015

A Christmas Gift!

When I attended the On Stage Local a few weeks ago, I received a lovely swap from Lynette Boehm.
 It was this swap that inspired my little gifts for two of my beautiful friend.

So I started with the nail file holders. I used black cardstock and punched the Scallop Toppers on either end. I then cut a strip of Winter Wonderland Vellum to measure the same length as the front an scalloped the top and stuck it down to the front after I stuck each edge down to make the pouch. Using the stamp from Work of Art I punched in gold (last years gold ink) and punched it with the 2" circle punch. Before I stuck it down on the front I twisted some Gold thread under it, and used the 1/8 gold ribbon at the top. A quick and easy gift for lovey ladies.


I didn't stop there though.......I then used this inspiration to make a second holder, but this time for nail polish. Again using Black cardstock, I punched the scallop topper at either end, but instead of sticking it together I scored 5" at either end leaving a 1 1/2 inch space where I stuck the nail polish on the cardstock. I added some of the winter wonderland DSP to the front, again scallop topper to align it perfectly. Then I tied it together with the gold ribbon. I stamped "Just for You" on Gold foil and punched with the 2 1/2" Circle punch.


I really wanted to present these together, so I used the Tag A Bag Gift Box, created a belly band with more Winter Wonderland DSP, Watermelon Wonder Lace Trim and half a Gold Metallic Foil Doilie. Stamped the sentiment from Embellished Ornaments in Watermelon Wonder and used the Triple banner punch to finish it off.


The ladies loved the gifts, and now I have these extra ideas to create for next year as well.


Merry Christmas Everyone!

Wednesday, 9 December 2015

Finally!

I was lucky enough to have attended the On stage local event with Stampin' Up! which enabled me to pre-order some items from the new occasions catalogue and receive sale-a-bration product, which was great. The only problem is I haven't had a chance to use anything from it..........Until today!

One of my work colleagues is departing soon, and I offered to create the farewell card, just so I could use some of the new products.

And here it is.........

To gain inspiration I used this weeks GDP challenge #GDP014 and of course my new products, with a focus on the Botanicals suite and the Sale-A-Bration item - Botanicals for you.


The colour scheme has that richness to it and as you can see in the details, co-ordinates so well together for a card that can be adapted for any occasion.

If you like this card and the products used, place an order through my shop before 31st December 2015 and receive a kit to create a card just like this one.

To keep up to date with everything happening in my Stampin' Up! space, subscribe now to my newsletter.

Until next time,

 Nikki Miers
Independent Stampin’ Up! Demonstrator 


Sunday, 29 November 2015

Supporting SANDS

Every year I support a close friend of mine in her SANDS fundraising event. At this event we purchase card and other paper project kits and get creative to raise money for Stillborn and Neonatal Death Support group. We also have an opportunity to win raffles (kindly donated by Stampin' Up!) and generally have a really fun day.

As I attend this event as a participant (rather than the demonstrator) I enjoy learning new projects and designs that I may not have normally attempted, and today was no different.

We started off using the Snow Place stamp set and matching thinlits. A great set that you can really have a little bit of fun with mixing and matching the accessories. I don't yet have this set, so it was great to have a go (and yes it is now on my wish list)


These cute little characters mixed with the Hearth and Home Thinlit and Softly Falling Embossing Folder creates a fun wintery effect.

Using the colours Bermuda Bay and Marina Mist also help create the wintery fun feeling as well.

One of the guests today said she may just add in a sun in the corner with some sand and send it to her friends in the US. Now that is how you could blend Aussie and America Christmas weather.


The next project we focused on was a range of Butterfly creations, using the Watercolour Wings stamp set, Bold Butterfly Thinlits and Butterflies Thinlits. We also had different card folds including two gated cards, a gift card holder and double fold which helped show just what can be done.


The colours are all from the 2015-2016 in colour range....Tip Top Taupe, Watermelon Wonder and Mint Macaron, and look really nice together.

The last project was the hanging star. Cutting 12 stars using the Star Framelits (the second largest size) with the smallest star cut inside. I used Pear Pizazz yardstick as I am going a green theme for Christmas. We connected each one anyplace a little battery operated team light inside it.  This is one project that I wouldn't necessarily have made, but now I know how, is one I will definitely re-create again.
There were also a few other little fun creations that I'm not sharing just yet, as some of you reading this may just receive them as a small Christmas surprise.

If you would like to participate in an event like this, or even hold one yourself, contact me to see how I can help you.


Sunday, 22 November 2015

A weekend of workshops!

As we head into Christmas our lives become busier than normal, and this weekend was no different. I had three events over three days. 

The first was my Goodstart group on Friday night. We created 6 different projects (yes ambitious) and had a lovely time sharing this together.

Here are just some of the projects we created - 


Then on Saturday I helped one of my Downline team members at a class. Head on over to my Facebook page to have look at some of the cards that I made to share at that event.

And today I joined my Upline to hold our very first Card Buffet. We created a few designs each for our guests to make. Here are my three designs.........

The first was using the Happy Scenes stamps and Hearth and Home dies.
We embossed the Chocolate Chip card in the brick folder, stamped the wintery Happy scenes image behind the sponged window frame. Delicately we then wrapped some Mint Macaron dotted lace trim around as the trimming on the window.


Next was the Calypso Coral and Smoky Slate Delicate Ornament card. This was one of the favourites from the guests, with all bar one preparation kit used.  The You've Got This background stamp just set off the die nicely.


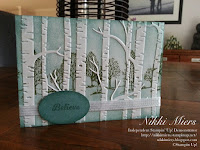
My third design used the joyous reindeer from the Jolly Christmas stamp set. A layered card with the first layer embossed with Decorative Dots folder, the second layer was stamped in Island Indigo with the Brushstrokes background stamp, the final layer had the Jolly Christmas Reindeer inside a 2-1/2" punch. The circle was rolled in Early Espresso (to match the reindeer) to provide some dimension. The believe stamp was cut using the word window punch.


After the fantastic feedback received about the Card Buffet, we will be holding a Birthday Buffet early next year to align with the Occasions Catalogue and Sale-A-Bration. If you would like to be kept up to date about this or other events make sure you subscribe to my newsletter by clicking on the link.

While the weekend was super busy, I really enjoyed helping my friends create some wonderful Christmas cards and I hope to help you do the same to at your own event soon. You can click here to organise hosting an event.

Sunday, 15 November 2015

On Stage! One to celebrate.

Celebrate good times come on!

Well we sure did. This weekend I had the pleasure of attending the first ever On Stage! Stampin' Up! event in Melbourne, where we celebrated with other demonstrators the upcoming wonderful offers at Stampin' Up!

This is one of the newly designed events for Stampin' Up! While we were celebrating in Melbourne, other On Stage! events were held in locations all over the world, with the main On Stage Live! in Brussel. It was fantastic to share the messages and offers across the world at the same time.

All demonstrators were invited to attend this event, where the upcoming 2016 Occasions Catalogue and Sale-A-Bration information was released as a sneak peek.  Yes, I said sneak peek - which means, I can't share anything with you YET.

But what I can share with you are the swaps I created for this event. We have an opportunity to share ideas with others through swapping creations. So for this event I used the Sheltering Tree stamp set.


To make these cards, I stamped the trunk image with the archival black stamp pad. Then I used markers from the Brights collection and randomly coloured in the leaves stamp. Before stamping the image, I spritzed the stamp which gave the image a watercolour look. I then used a variety of Brights colours to stamp the sentiment "Thankful for you" from the same stamp set on the bottom of each card. I must say, they turned out very pretty.
Built for Free Using: My Stampin Blog


I will be sharing some of the ideas from the swaps I collected on my Facebook page over the next week.

The event also gave me an opportunity to spend some time with friends old and new.


If you too would like to see what the Stampin' Up! events are all about contact me to discuss how you can join my team and come along with me next April to the Gold Coast event.

Tuesday, 13 October 2015

Find the Fairy!

My sisters grand baby turned one today, and the special fairy gift really needed a fairy card to go with it. So how was I going to create "Fairy" when there are no fairy stamps.

After flicking through all of my stamps, I then read the Global Design Project #GDP006. This week the challenge is a sketch. A simple but stylish design to use as the inspiration, and then I had it.

The angled design gave me an idea for my much needed fairy card. 

So what process did I go through?
 - First the stamp set "Secret Garden" just talks to me about fairies, and the stamp has an angled design aswell.
 - Next, the heart embellishment in the sketch gave me the idea of thats where a fairy wing could be seen. The "Bold Butterfly Framelits" made the perfect fairy wings, but I just wanted them to look like they were hidden amongst the garden.
 - After I stamped the secret garden, I used the blender pens and a variety of subtle colours to whimsically colour in the stamp. 
 - Then using the new "Fine Tip Glue Pen" I stuck down the edge of the wing, not before using the same glue over the wing and sprinkling on glitter.
 - Almost done, I added further glue around the edge of the flowers to follow the angled design again and sprinkled with glitter.
 - The last element was to get a sentiment along the angle, The teeny tiny sentiment, just like fairies, added a petite message.


So the fairy garden card now has pretty glitter and is perfect to match the fairy lamp for a little fairies first birthday.


Tuesday, 6 October 2015

Well - I did it. I have upgraded my blog. I hope you all like the new blog which provides easy access to everything you need to stay connected to me and Stampin' Up!

If there are any features you would like me to include please contact me with your ideas.

Stay tuned for a variety of ideas, offers and events that will get your creativity flowing.

Thanks

Nikki Miers
Independent Stampin’ Up Demonstrator 

©Stampin Up!