What do you do on a cloudy overcast day?
Get crafty!!!!!!!
And that's exactly what I did, well after my gym session anyway.
I have been slowly using my new products, one by one, to create samples for my launch and workshops after the new Occasions catalogue and Sale-A-Bration is released. If you would like to attend one, or have your own don't forget to contact me so we can organise something just for you.
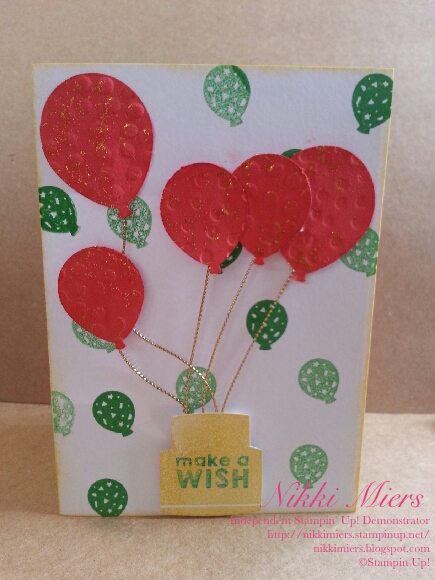
For today's card I wanted to use the Party Pop-Up Thinlits. These thinlits create a lovely pop out that you place inside a card. On Whisper White cardstock I created the inside by cutting the pop out, but when I looked at it on the white against the white card I had prepared, it needed something else to make it pop further. Watermelon Wonder sponge to the rescue, or so I thought. It still didn't look finished, so I turned to the new Party Wishes stamp set to the wonderful mini cupcake, mini balloon and mini candle. I chose the colours Cucumber Crush, Daffodil Delight and Tempting Turquoise to add a bit more around my Party Pop.
Then it was time to work on the card itself. The next product I really wanted to use was the new Balloon Bouquet punch. To bring the inside and the outside together I used the Cucumber Crush mini balloon stamp again to create a background. After punching out Watermelon Wonder Balloons I put them through the big shot in the Decorative Dots embossing folder. The balloons needed something to tie them down, that's where the cake stamp from Party Wishes cut downtime in handy. So I used the marker to colour the Make A Wish stamp to only get the words on the cake (which is now a vase - don't you just love versatility) The gold trim from the current holiday catalogue made great ribbons for the balloons, and a sponge of Daffodil Delight around the edge. After putting it all together I was almost happy.
So how did I finish it off? Dazzling Details!!!!!!!! The gold kind. A little on my finger and I smudged it over the balloons on the outside and over the pop on the inside. And now I was happy it was finished.
If you like the look of this card and would like to learn how to make this or others, contact me today. If you would like to purchase any of the products I used here, head over to my online shop.
And don't forget - cloudy days make the best craft days!


No comments:
Post a Comment